Get work done with Redmine Reporting counter boxes
Plugin webinar created by AlphaNodes GmbH, Oktober 2019. Use the Space key or the arrow keys to navigate through all slides.

Presented by: Claudia Meindl, Redmine Expert
Hello and welcome to our about 5 minutes lasting best practice session on how to use Redmine Reporting Plugin functionality to get work done.
Our best practice session on Redmine Reporting
covers the following sections:
- Query groups
- Custom queries
- Counters
Introduction
Not every user likes never ending To-Do-Lists. Even we know how they can destroy enthusiasm for one's work. That's why we have implemented the so called Counter boxes of the Redmine Reporting Plugin.
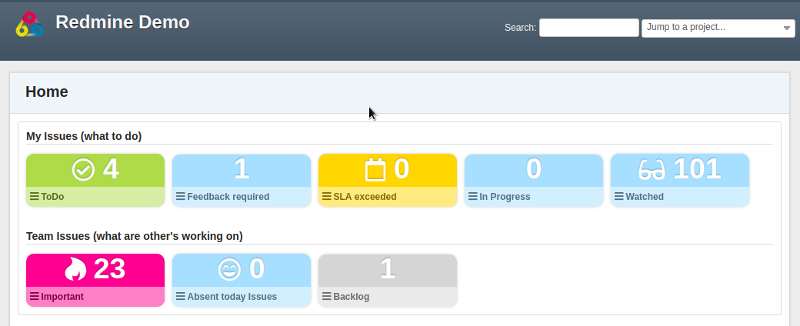
They help to visualize the work that needs to be done in a more user friendly way.
They also make it easier for new employees to get started in Redmine.
The configuration takes place after you have installed the required plugin.
The configuration must be made by a user with administration rights in the plugin settings.
Let's get started
Query groups
Go to the plugin settings and create Query groups you need for your team. Define where to display them. A good start in general are the following one's:
- My Issues (what do I have to do)
- Team Issues (what are other's working on)
Custom queries
Now you need public (to any users & for all projects) available custom queries for issues, that fit your needs. A good start in general are the following one's:
- To Do (for your tasks)
- To Do (for the whole team)
- Feedback required
- Watched by me
Activate counter boxes
To make your saved queries available in your Query groups you need to edit them and activate the counter box section. Watch the upcoming video to see how.
Counters
Some information on counter box configuration options.
| Query group | After activating the box you assign it to an available query group via mouse click |
| Name | Use a short name for display |
| Icon | Assign a funny icon |
| Color | Choose a nice color for the box |
| Weight | Position the counter box in the query group via weight number |
| Threshold options | Activate the Threshold if you wish to make the counter box only visible when a certain threshold number has been reached. Otherwise it will be hidden. |
Done.
You are ready to go!
Thank you!
For further information on how to use the plugin download the documentation in our support area (accessable for customers, only).