Redmine DevOps
Your tools on the project dashboard
AlphaNodes online training, about 5 minutes
What the plugin does
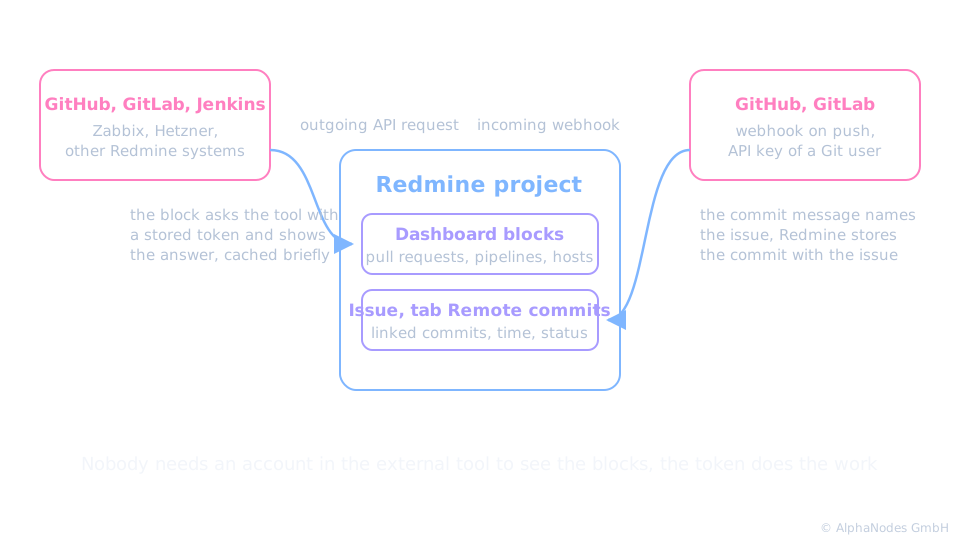
DevOps shows information from the tools around your code inside Redmine, as dashboard blocks on the project overview.
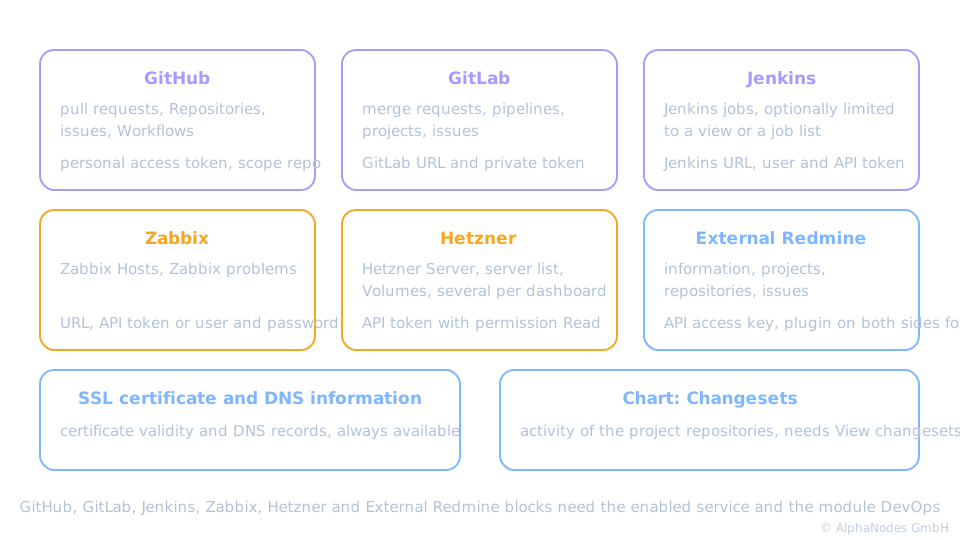
- Outgoing: pull requests, pipelines, jobs, hosts and servers from GitHub, GitLab, Jenkins, Zabbix, Hetzner and other Redmine systems
- Incoming: commits from GitHub and GitLab linked to issues by webhook
- Everyone whose role may view the block sees it, without an account in the external tool
Outgoing and incoming
Which tools, which blocks
Setting it up
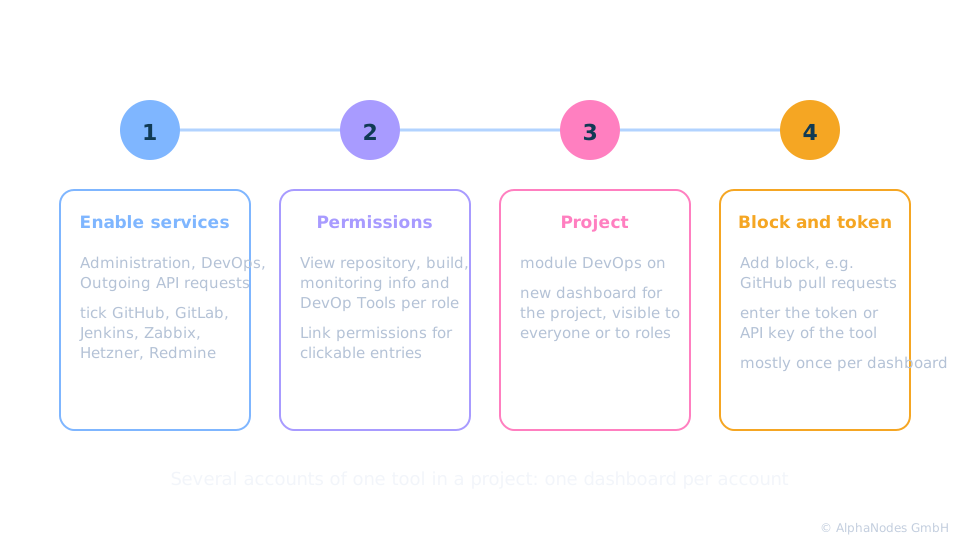
Four steps from switch to block
The four steps
Step 1: Enable the services
- Administration, DevOps, section General, Outgoing API requests
- Enable GitHub, GitLab, Jenkins, Zabbix, Hetzner or Redmine as needed
- Only enabled services offer their blocks in the projects
Step 2: Roles and permissions
- View repository info, View build info and View monitoring info let a role see the blocks, View DevOp Tools covers SSL and DNS
- The matching Link permissions make most entries clickable into the external tool, issue and Hetzner blocks always link
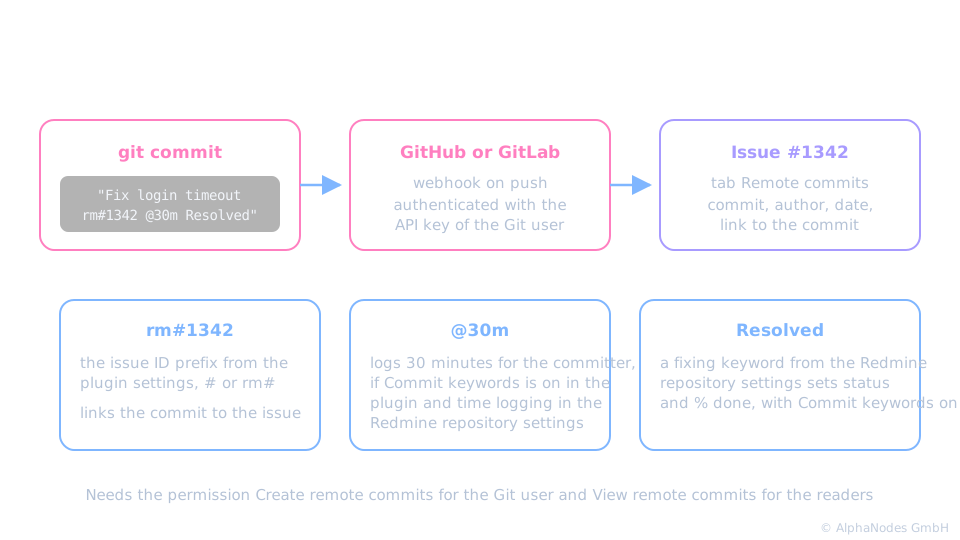
- View remote commits and Create remote commits for the incoming direction
Step 3: Project and dashboard
- Activate the module DevOps in the project settings
- Create a new dashboard for the project, visible to everyone or to selected roles
- One account per block, several accounts via several dashboards
Step 4: Add and configure the block
- Add block, pick for example GitHub pull requests, GitLab pipelines or Jenkins jobs
- Enter the access data of the tool: a GitHub Personal Access Token with scope repo, a GitLab URL and private token, a Jenkins URL, user and API token, a Zabbix URL with API token or user and password, a Hetzner read token, URL and API access key of the external Redmine
- Most blocks can be added once per dashboard, Hetzner, SSL and DNS blocks several times
The block shows the data of the account whose token is stored. Keep tokens like passwords and watch the API rate limits of GitHub and GitLab.
Commits that know their issue
Remote commits
- A webhook in GitHub or GitLab sends every push to Redmine, authenticated with the API key of a dedicated Git user
- The commit message names the issue with the configured prefix, for example rm#1342
- Commits appear in the tab Remote commits of the issue, filters find issues by commit date, provider, author and message
- With Commit keywords switched on in the plugin settings, a commit can log time and change the status using the keywords of the Redmine repository settings
In short
Enable the service, give the roles their view, add the block with a token, and let commits find their issues.
Requirements
- Reporting and Additionals plugins, REST web service enabled for webhooks, access to the external tools by API
- External Redmine information and repositories need the DevOps plugin on the other system as well
- Part of the Enterprise+ bundle
See it live
Try the plugin in our online demo
Product page · Back to online training
© AlphaNodes GmbH, all rights reserved