
Not only large companies with many projects sometimes lose track of certain tasks. Small to medium-sized teams also have a lot to do and often fewer resources available than the big ones. Both have to deal with the same problems: recurring, manual, time-consuming tasks for processing tickets.
Automation puts a stop to wasted resources in this way. And you can better focus on the tasks that matter.
In today’s post, you’ll learn a few typical examples for which the Automation plugin is suitable.
Automatically assigning issues to someone on your team
How does your team handle tickets that have not been assigned to anyone? Or that have not yet been handled by the assigned person?
Many employees rely on the project manager to take care of assigning tasks to someone. But this can lead to unassigned tasks, as well as incorrectly assigned tickets, remaining unprocessed.
Assign issue processors automatically
This is where the Automation Plugin can help. For example, by specifying that tasks are automatically assigned to someone in the team.
How to create an event-based issue rule
- Select a trigger (Event - Save Issue) for the rule as well as conditions to define which issue should be assigned automatically.
- A condition must be the following in any case: *Assigned to = none
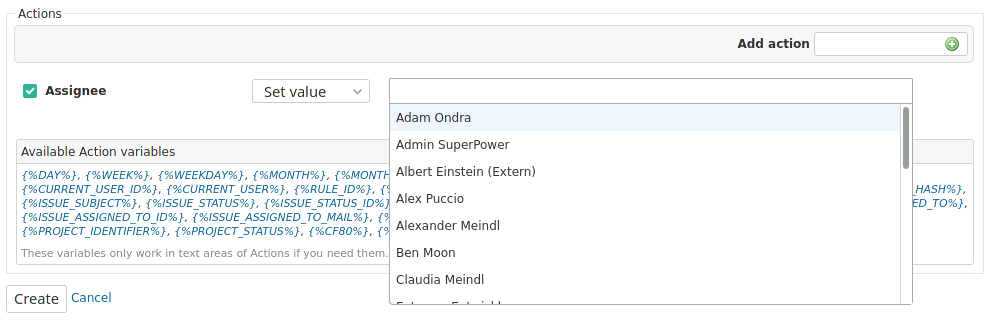
- Then, in the Actions section, add the following action: Assigned to = Set value. For this, you search for the appropriate team member in the user list and select it. Make sure that the selected member is also assigned to the project.
- Name and activate the rule before saving to apply the action.
How to create a scheduled ticket rule
If the assigned user does not care about processing the ticket, you can assign the ticket to someone else in the following step. A new rule is necessary for this.
- Select a trigger ( Scheduled - Issues) for your rule and set as Interval pattern the time when the rule execution should be checked (e.g. daily at 6:15 a.m.).
- Now select the conditions with which you define when tickets should be automatically assigned to another agent from the team.
- If the ticket was created in the last 5 days and the agent has not yet taken care of it, the condition is for example as follows: Created = in the last 5 days. Updated = none.
- Then in the Actions section you add the following action: Assigned to = Set value. For this, search for the appropriate team member in the user list and select it. Make sure that the selected member is also assigned to the project.
- Name and activate the rule before saving to apply the action.
Interval pattern: Cron syntax is used for this. For the creation crontab guru can be useful. This way you get the most flexibility for defining timed defaults. Examples: daily at 5 am = 0 5 * * * every 50 minutes = */50 * * * *
Schedule tasks
Planning tasks often takes a lot of effort. For example, when a customer has submitted a support request. The support employee has answered it, but the customer no longer responds. For this you can create a rule that sends a reminder to the customer. And closes the issue for the time being.
Automatically remind issue author and close ticket
Here, too, the Automation Plugin supports you with its ticket rules. For example, by specifying that tickets are automatically closed after 5 days of inactivity.
How to create a scheduled issue rule
- Choose a trigger ( Scheduled - Issues) for your rule and set as interval pattern the time when the rule execution should be checked (e.g. daily at 8:15 am).
- Now select the conditions with which you define when open tickets that are waiting for acceptance should be closed automatically.
- If the ticket has been assigned to the author in the last 5 days (e.g. status = To Verify) and the author has not yet taken care of the acceptance, the time condition is for example as follows: Updated = more than 5 days ago.
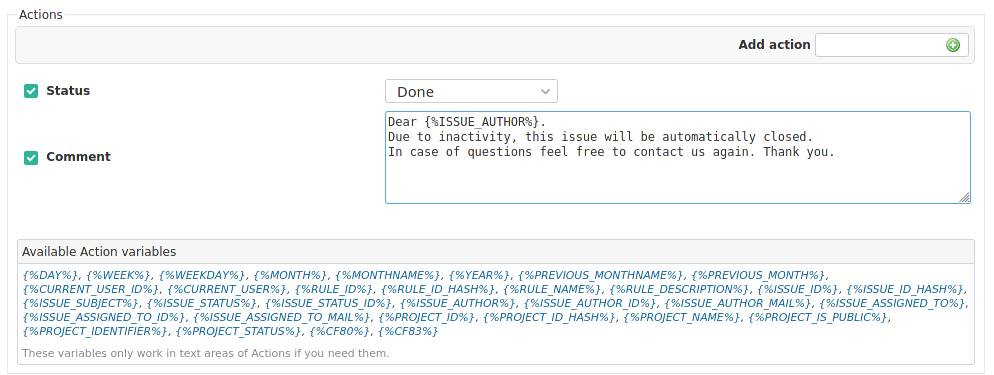
- Then in the Actions section you add the following action: Status = Done. As well as Comment and inform the author why the ticket is now closed.
- Name and activate the rule, before “Saving” to apply the action.
Conclusion: Redmine Automation creates time reserves
So, with the Redmine Automation plugin, you can easily and safely automate time-consuming, recurring activities like the examples mentioned here, and focus on other tasks in the meantime.
All you have to do when dealing with the topic of automation in Redmine is:
- take the time to work out the rules you need for yourself.
- Then create and test them accordingly.
- And if everything fits, to arm by means of “activation”.
All information about our extensions for Redmine is available on the product page. The commercial Automation plugin is available in a cheaper bundle. It requires the Reporting Plugin. Customers whose Redmine does not meet the minimum requirements or who prefer to hire someone to install and regularly maintain their Redmine instance have the alternative to book our Managed Application Hosting for Redmine. Here, the plugin is already part of our hosting offering. The functionality can be tested extensively in our online demo.