
Your developers work in GitLab. Project managers, testers and support work in Redmine. Both sides look at different systems and ask each other for the status. The Redmine DevOps Plugin brings the GitLab data to Redmine, so the whole project team sees it there.
We wrote about this in 2021. Since then the setup has changed in a few places. Commits show up in more places than the issue history, and one block configuration can serve many projects. This article describes the current state.
Dashboard Blocks for Redmine
The plugin reads from GitLab and shows the data as dashboard blocks on the project overview. Four blocks are available:
- GitLab Projects: the projects of the connected account or the ones you list
- GitLab Pipelines: build and deployment status, optionally only the failed ones
- GitLab Merge Requests: open merge requests, optionally filtered by label
- GitLab Issues: issues from GitLab, optionally filtered by label
Every block links to GitLab. The work itself stays there. Redmine only reads through the GitLab API and never writes back.
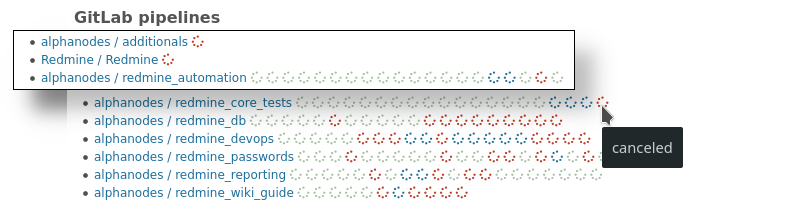
Dashboard block example for Redmine: GitLab Pipelines
Who sees the blocks is a matter of roles. A role needs the permission to view repository information or build information. Whether the entries link to GitLab is a separate permission. A stakeholder can therefore see the pipeline status without getting a link into GitLab.
DevOps Settings for GitLab
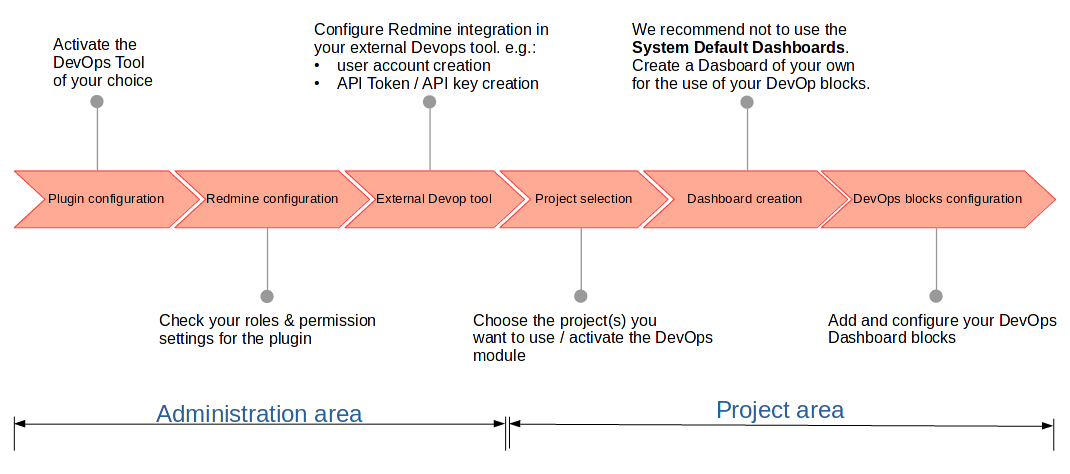
The setup takes five steps. The first three are done once by an administrator, the last two per project.
Plugin settings. Under Administration / Plugins / DevOps, section General, tick Enable GitLab. Without this, the GitLab blocks do not appear anywhere.
Roles and permissions. Give the roles that should see the data the permissions View repository info (projects, merge requests, issues) and View build info (pipelines). Add Link to repository info and Link to build info if the entries should link to GitLab. The roles also need the dashboard permissions of the Additionals Plugin to create or edit a dashboard.
Access token in GitLab. Create a personal access token in the GitLab user profile with the scopes read_api and read_repository, without an expiry date. Use a technical GitLab account for a shared dashboard, or the personal account for a private one.
Project settings. Enable the module DevOps in the project.
Dashboard. On the project overview, create a new dashboard and add the GitLab blocks you need. Each block asks for the GitLab URL and the token. Optionally you restrict the projects, filter by labels or limit the number of entries. The token is stored in the block, not in the plugin settings.
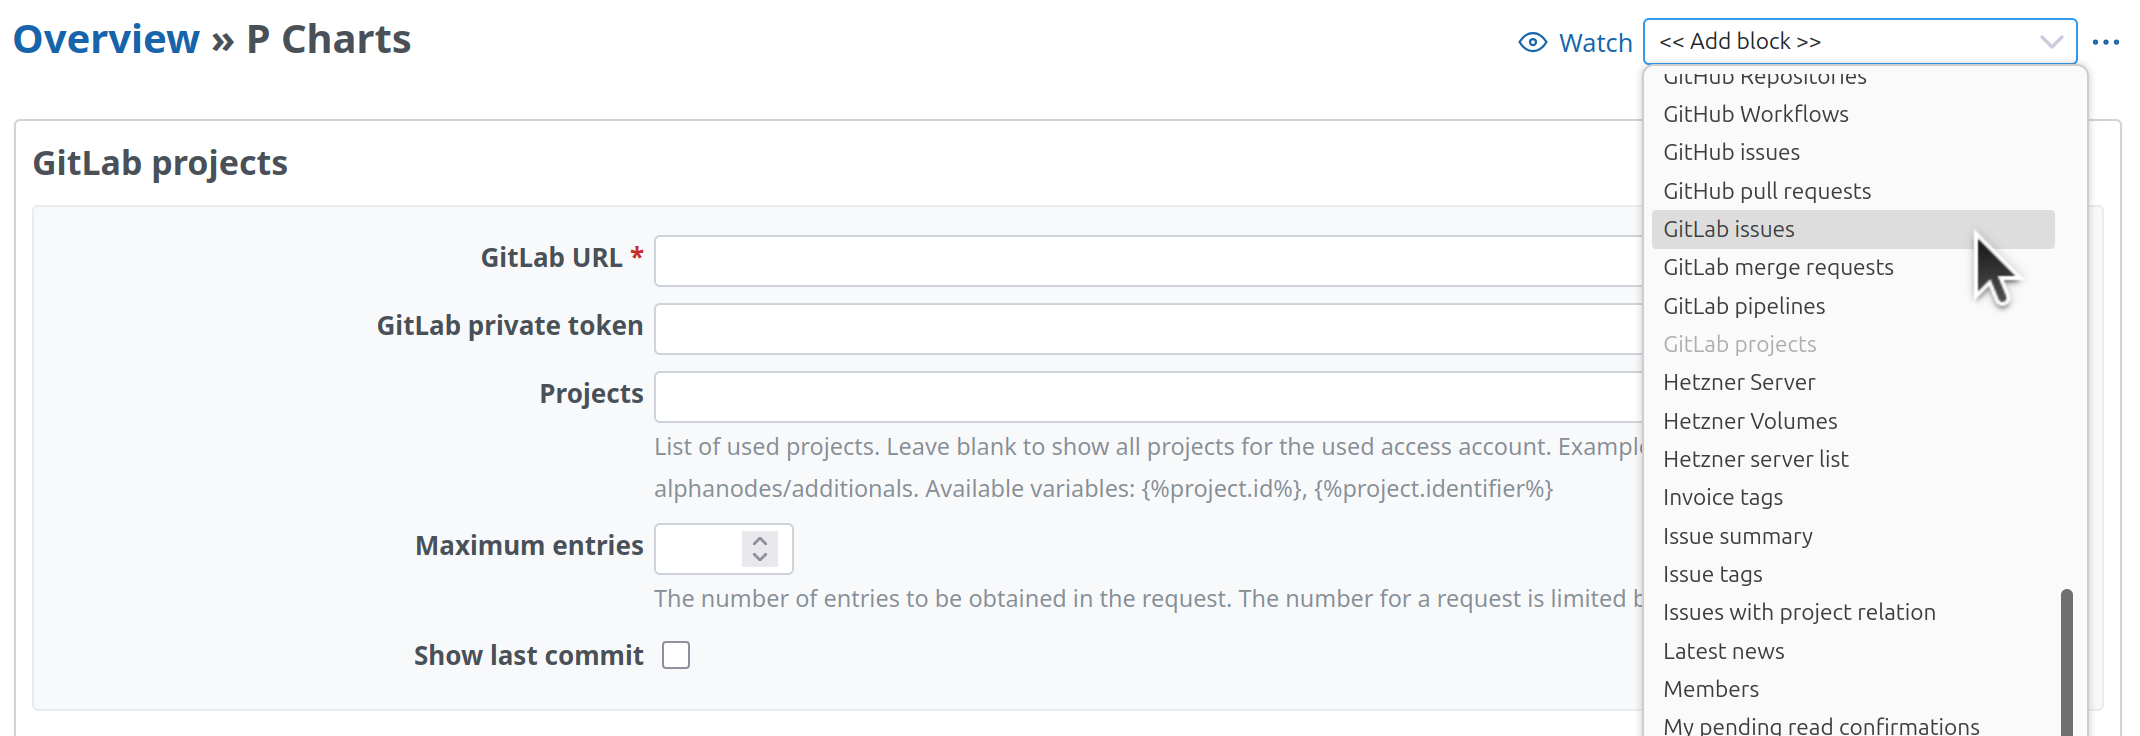
We recommend a dedicated dashboard for the GitLab blocks instead of changing the system default dashboard. Two ways to use it:
- A shared dashboard, visible to all project members or to selected roles, configured once with a token of a technical GitLab account.
- Private dashboards. Each team member creates an own dashboard and enters a personal token. Then everyone sees exactly what their GitLab account sees.
Each block can be added once per dashboard. If you need several GitLab accounts in one project, create a second dashboard.
One block configuration for many projects possible
Many teams use the same naming in Redmine and GitLab. Then the blocks do not need to be configured per project. In the projects field you enter a placeholder such as group/{%project.identifier%}. Redmine replaces it with the identifier of the current project.
A dashboard with this configuration works in every project that follows the naming. This makes it possible to roll out the GitLab blocks across all projects at once.
Issue reference via commit message
Redmine’s own repository integration needs the repository on the Redmine server. With GitLab that is usually not the case. The DevOps Plugin therefore turns this around: GitLab reports every push to Redmine through a webhook.
The commit message contains the issue reference, for example:
git commit -m "Fix login timeout rm#123"
Redmine reads the reference and attaches the commit to issue 123. The prefix is set globally in the plugin configuration. We recommend rm#, because #123 already means a GitLab issue on the GitLab side. Decide this before going live, because the prefix does not change commits that are already imported.
This part needs four more settings:
REST API. Under Administration / Settings / API, enable the REST web service. Otherwise the webhook cannot log in.
Technical user. Create a Redmine user such as devops-bot, without administrator rights. Its API access key is shown under My account. The user needs a role with the permission Create remote commits and a membership in every project whose issues are referenced. Readers need View remote commits.
Issue ID prefix. In the plugin settings, section Incoming API requests, choose
#orrm#.Webhook in GitLab. In the GitLab project, under Settings / Webhooks, enter the URL of your Redmine with the endpoint
/remote_commits/gitlab.jsonand the API key of the technical user. Trigger: push events. Keep SSL verification enabled and use the test button once.
Attached commits are visible in four places:
- on the issue, in the tab Remote Commits
- in the issue list, as filters and columns for author, date, service and commit message
- in the project activity, if the entry Remote Commits is enabled there
- in the Redmine search, through the text of the commit message
If nothing is attached, the webhook answers with the reason. GitLab shows that answer in its webhook history, which is the first place to look when something does not work.
Status change and time logging from the commit message
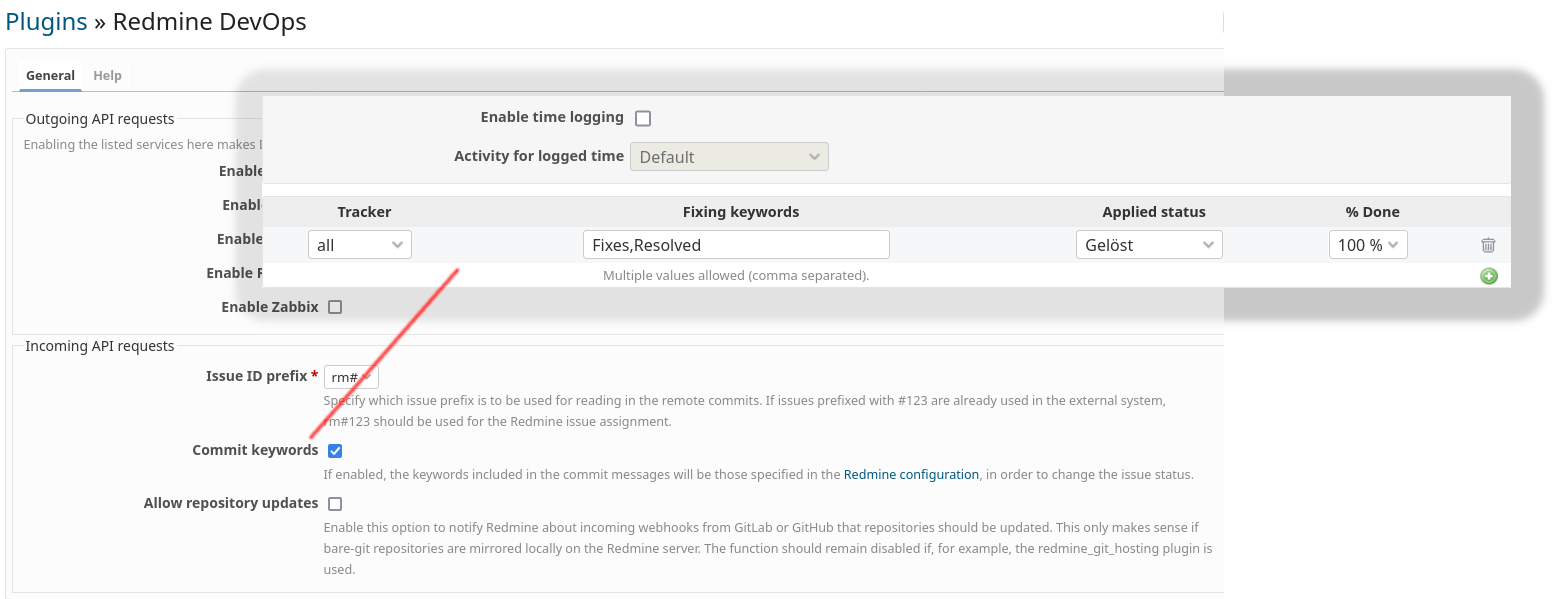 Enable the option to use keywords from the commit message for an issue status change
Redmine can change an issue through a commit message. The keywords are defined under Administration / Settings / Repositories. If the option Commit keywords is enabled in the plugin, the same rules apply to remote commits from GitLab:
- a keyword such as
fixesorresolvessets the status and the progress, optionally only for certain trackers - issues that are already closed are not changed again
- with time logging via commit message enabled,
@2hor@30mbooks the time on the issue
One thing to check before relying on it: Redmine matches the committer through the e-mail address. The address in the Git configuration must be the address of the Redmine account. If it does not match, the change appears as anonymous and no time is booked.
If you mirror repositories on the Redmine server
Some installations keep a local Git clone on the Redmine server and register it as a project repository. For them the plugin offers a second webhook. After a push, Redmine fetches the changes right away instead of waiting for the next scheduled fetch. The option is off by default and should stay off if you use the plugin redmine_git_hosting.
For repositories that are registered in Redmine, the plugin also adds a cross-project Changesets list. It works like the issue list: filter, group, save the query and place it on a dashboard, as a list or as a chart of the commit activity over time.
If you do not want to run GitLab yourself, we host it for you in Germany, together with Redmine if you like: Managed GitLab Hosting.
The DevOps Plugin is available on its own or as part of the Enterprise+ bundle. You can try the GitLab blocks in our online demo. Feel free to create a project of your own and activate the module in the project settings.
All functions at a glance: Redmine DevOps Plugin.